|
Its time for you the ten essentials are items considered necessary for survival in the woods. It began as a list of items and roughly thirty years later it morphed into a system list. While the original essential list is good, the system list is a bit more comprehensive because it lets you build "kits" tailored to your personal needs and taste. Not only should you be carrying these items on overnight backcountry trips, but they should also always be carried on day hikes. Sometimes things go wrong and it is better to plan for the worst and be prepared then to be in a situation where you wish you had brought something and do not have it. The Original Essential List
The New System List
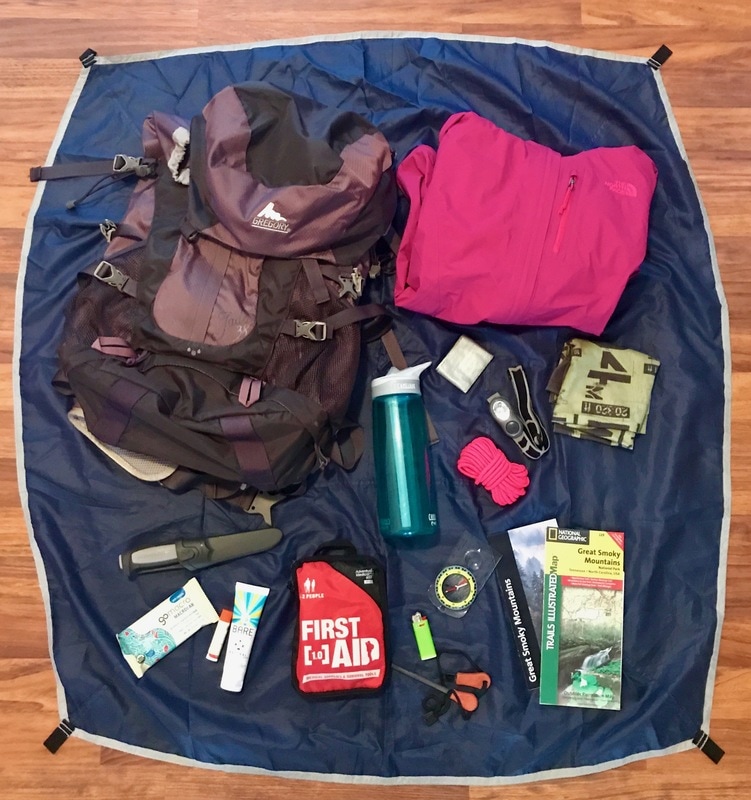
Whats in my pack? When it comes to hiking and backpacking I am always concerned about weight so I tend to choose smaller and lighter items. Here are the essentials I carry in my pack.....
This probably seems like an awful lot of gear, but honestly it packs down pretty small and I have never had an issue with weight. Now it's time for you to pick your gear and hit the trail! Happy hiking!
0 Comments
Trail Encounters Most bear attacks occur because the bear is startled by your presence in an area or on a trail. Just because a trail is well used by hikers or joggers doesn't necessarily mean there aren't bears on it or around it. Would you want to walk through a bunch of trees or use a perfectly well groomed trail? One of the biggest preventative strategies to avoiding an encounter is to yell out and let the bears know you are there. Every so often just say, "Hey Yogi" or "I'm here bear" to hopefully lessen any possibility of creeping up on a bear. Generally if a grizzly bear attacks you its because they are defending their territory and/or their cubs. In every encounter I have read about the people who play dead in this situation tend to be the ones that live. On the other hand you will want to fight back against a black bear, especially one that is displaying stalking behaviour. If you are charged or attacked by a bear there are some general things you can do:
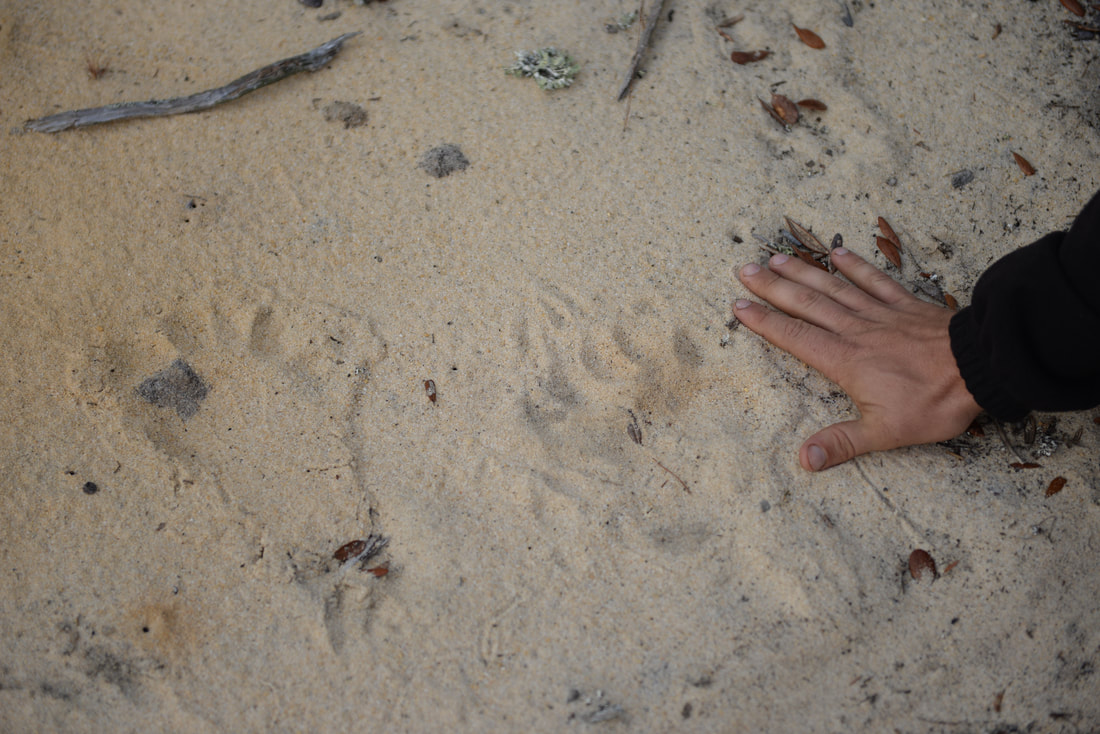
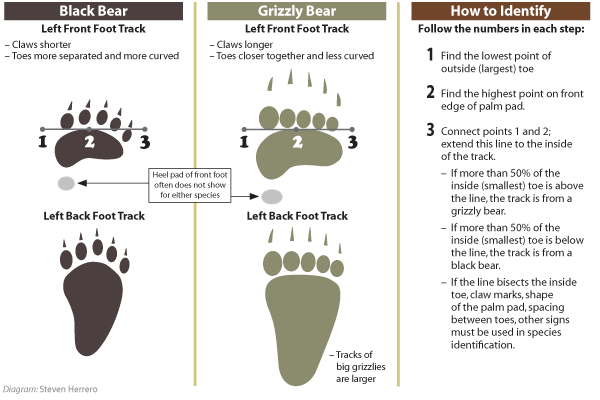
Bear Signs There are lots of signs that will let you know if a bear is in or frequents the location you are at. For example, tree markings, bear scat, tracks, smell, destroyed vegetation and overturned rocks are tell-tale signs of bear activity. If you are down wind from a bear you will often times get a whiff of something "dirty" smelling. This is important to keep in mind, especially if the wind is blowing towards you and not towards the bear. It is easy to accidentally stumble upon a bear if they cannot smell or hear you. Black bear track in Ocala National Forest Bear Tracks - This diagram is from Steven Herrero from the Western Wildlife Outreach
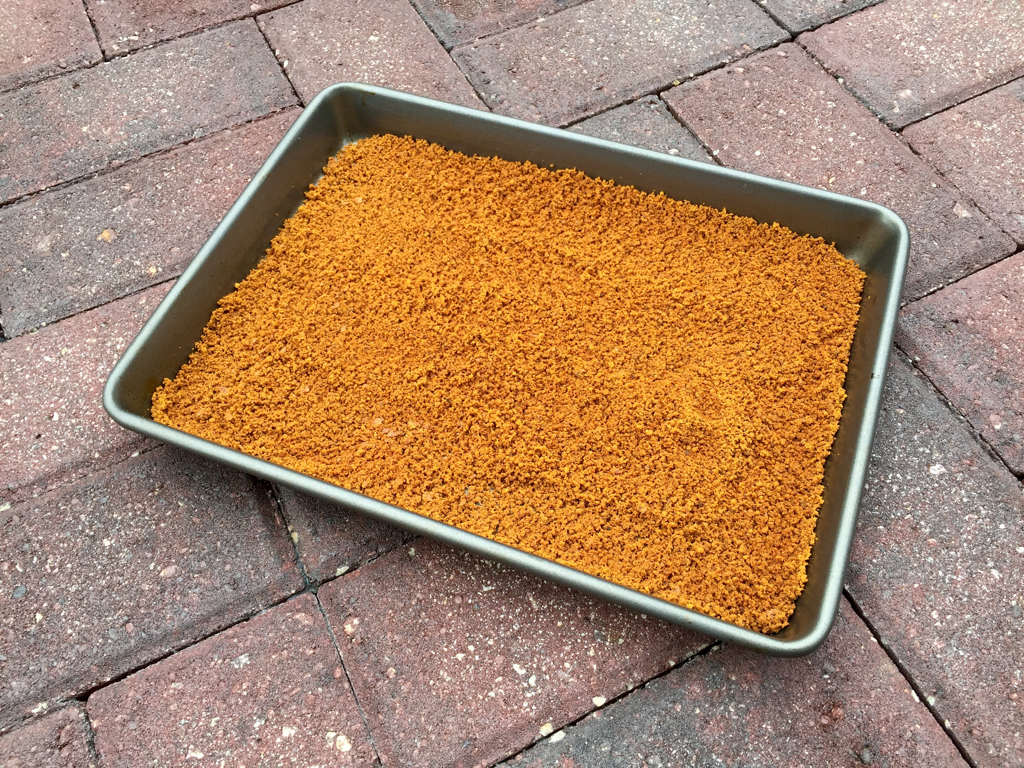
Those pesky little acorns that drop all over your yard could keep you eating in a survival situation. It's a relatively lengthy process from start to finish but it's well worth it. You can also use this flour at home to make breads, pancakes and other baked goods. Below you find step by step instructions for hot to take an acorn to flour in a primitive situation. In parenthesis I will suggest some faster ways for making this at home. Step 1 - Collecting: You want to make sure to collect healthy acorns. Check for any holes on the acorns as this equates to worms and you definitely want to stay away from those. Once you have gathered up a good amount of acorns it's time to crack them open. Step 2 - Crushing: Try to find two rocks that are smooth and flat. If one of the rocks has an indentation on it this will work even better as it will help hold the acorn in place as you crush it. Preferably, you want the nut to come out pretty much in tact. If it's all crumbly when it comes out it probably isn't a good nut to eat. (Crushing acorns at home can be time consuming so you can use a nut cracker to get the job done quicker.) Step 3 - Grinding: Now it's time to take the nuts you smashed open and grind them down into smaller, more powder like pieces. In the next step you will remove tannins from the nuts and it will be a quicker process if the size of the nuts are smaller. You can do this by just smashing the nuts more with the rocks you used before and grinding them to a powder consistency. (For my home makers it's time to break out that food processor. This will make your life so much easier. Drop your nuts in and grind away.) Step 4 - Tannin Removal: Acorns have a good amount of tannin in them which can make them bitter. Tannin is what makes a river have a brownish color and comes from plant material leaching into the water. To remove this from the nut you will want to soak them in a flowing river. You can use a sock, t-shirt, cheesecloth or similar material to put the flour in for soaking. The longer the nuts sit in the water the more tannin that leaches out. Certainly leaving them overnight will get the job done. (If your doing this at home and don't have access to a river you can soak the acorn powder in the sink. Fill the sink and let the acorns sit for 30 minutes to an hour. Drain the water and repeat the process a couple more times.) Step 5 - Drying: Place the nut flour out in the sun to dry. The timing for this process will depend on the amount of flour and how sunny it is. Once you have dry flour you can store it and use it as needed. In a survival situation you can mix the flour with water and eat it as a paste.
|
|

